Leather Holster for a Flip 2 Phone - Part 2
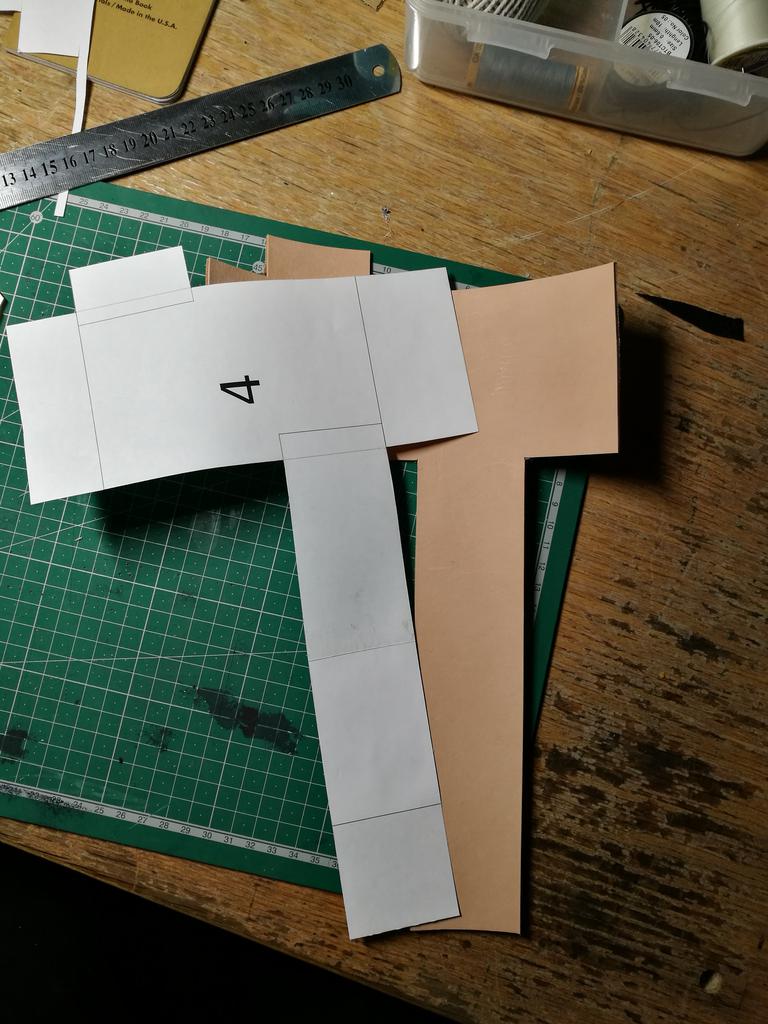
In part 1, having received a commission for a custom leather phone pouch, I had to figure out how to make it without the phone to work from. I made up a wooden form to shape the leather, prototyped in cardboard and finally made up a template. Onward!
I'm fairly well practiced at these steps now, although there's always a bit of tension working with soft leather - it marks so easily until it's waxed, so you have to be very careful with any hard tools and even fingernails around it or you can write off a couple of hours work (and some reasonably costly hide) in a moment.
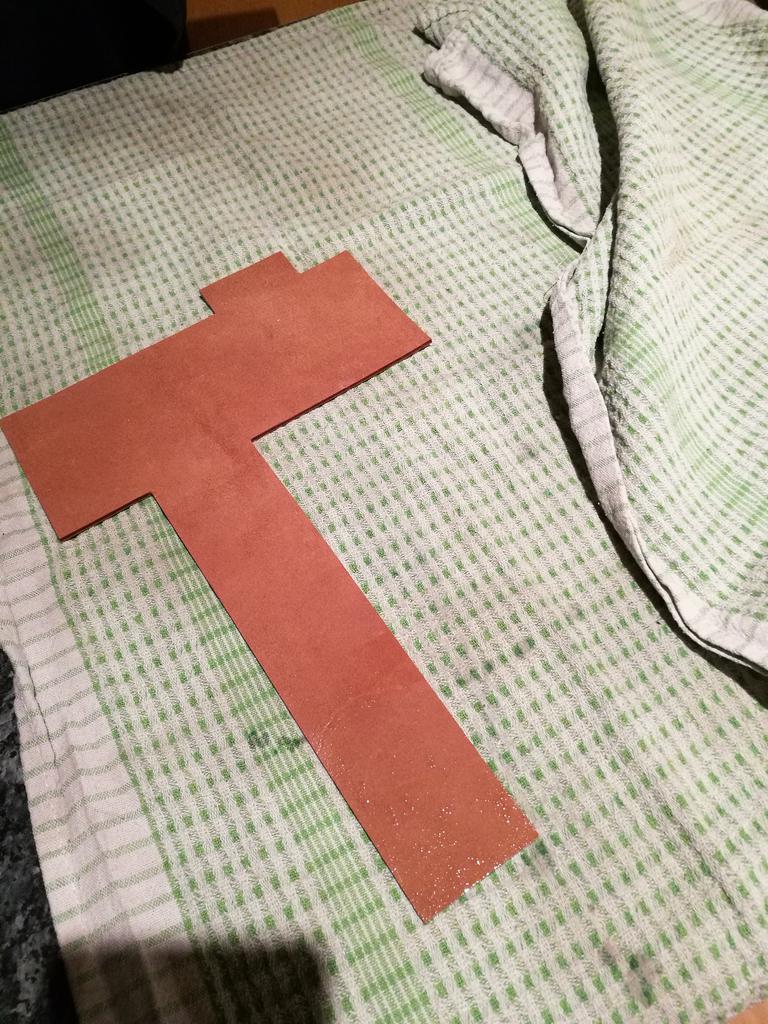
The leather blank was cut to the template, soaked (requiring the use of a spare plastic drawer as it was too big for any of my tubs)...

...excess water pressed out with a towel and I put it to dry with one of my usual improvised clamping agglomerations.

Once fully dry and holding its shape, it was glued and grooves cut for the stitches. You can see a bit more detail on all these steps in my Leatherman Squirt pouch post.


Although it took a lot longer, it was nice for once sewing together something bigger than a matchbox :)


One of the things I learned making the Leatherman Squirt pouches was to leave a decent bit of excess on the side tab to make it easier to clamp, glue and sew.

This was now trimmed off, and all the corners rounded. I used a washer as a guide to trim the corners of the flap to a neat radius, and finished all the edges with fine sandpaper to soften and round them, with a final buff using a piece of scrap denim to remove the fluff and polish the edges.


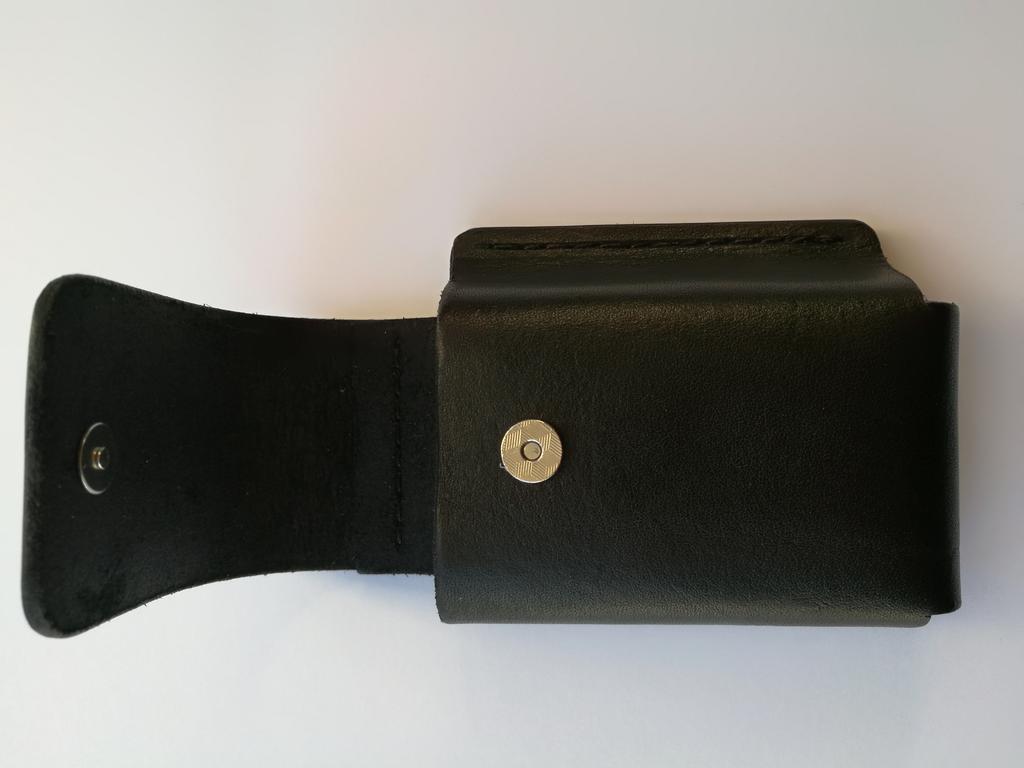
The body of the sheath was now basically finished, and could be dyed black and given my usual three or so coats of carnauba creme, buffed to a nice sheen.


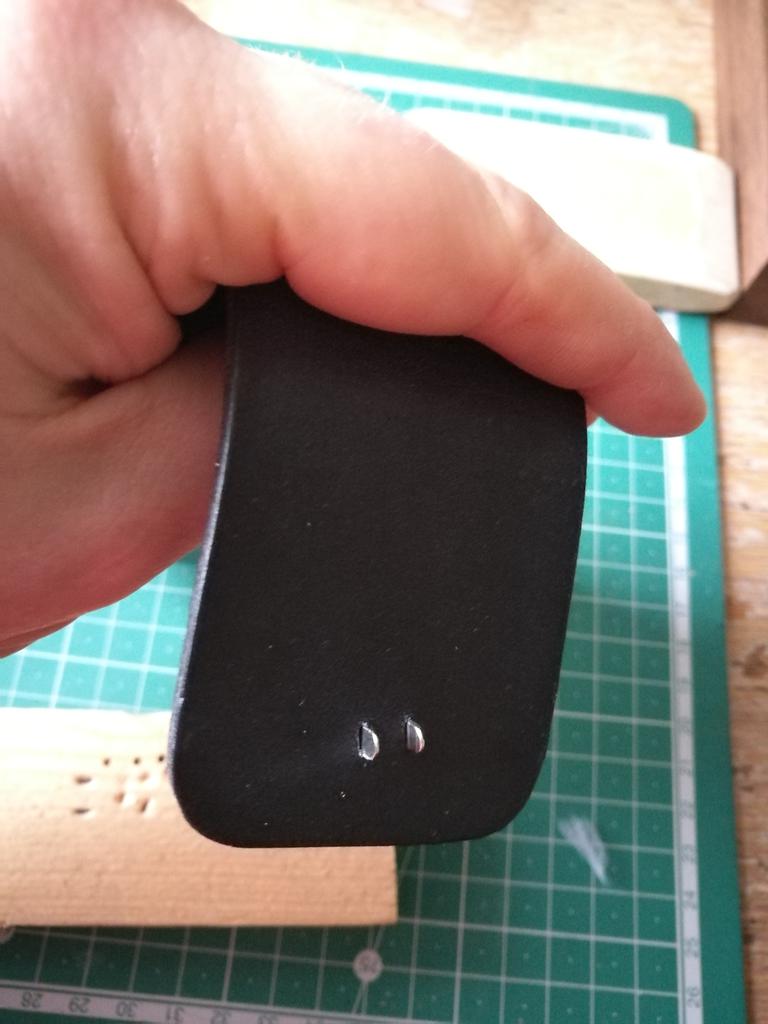
Next, adding the magnetic snap. I'd already used these push-through snaps on my leather portfolio case so I had a good process down.

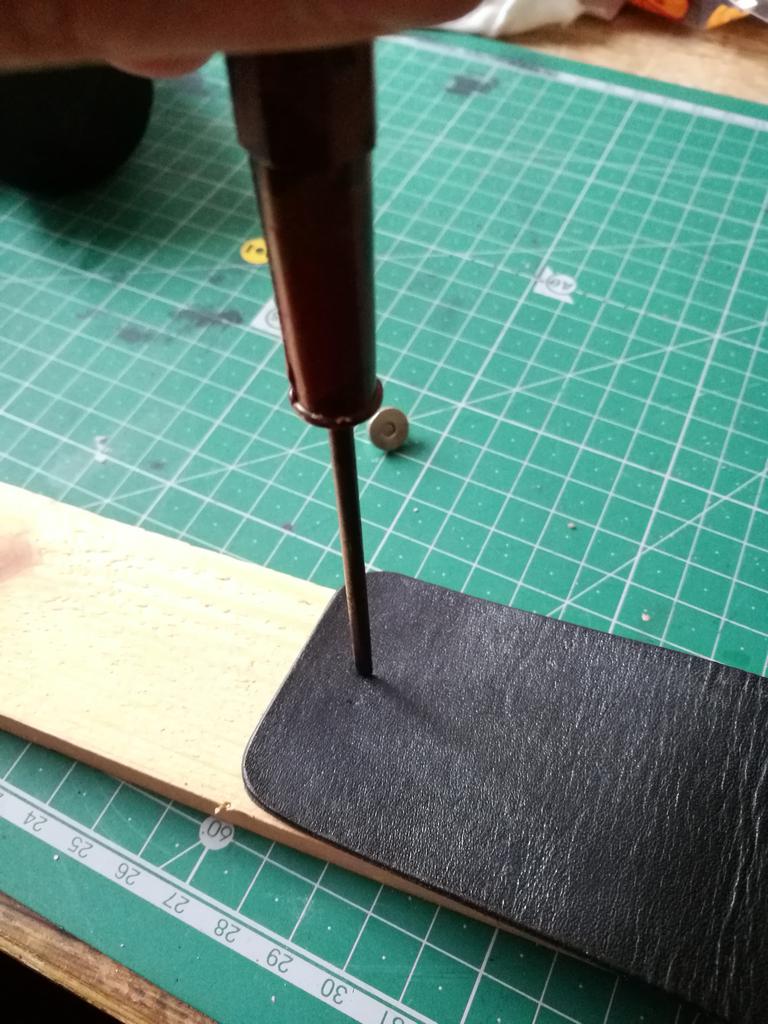
First, press the prongs against the leather to mark where they would go, then punch holes for them by the simple and inelegant approach of knocking a screwdriver through with a rubber mallet into a piece of wood.
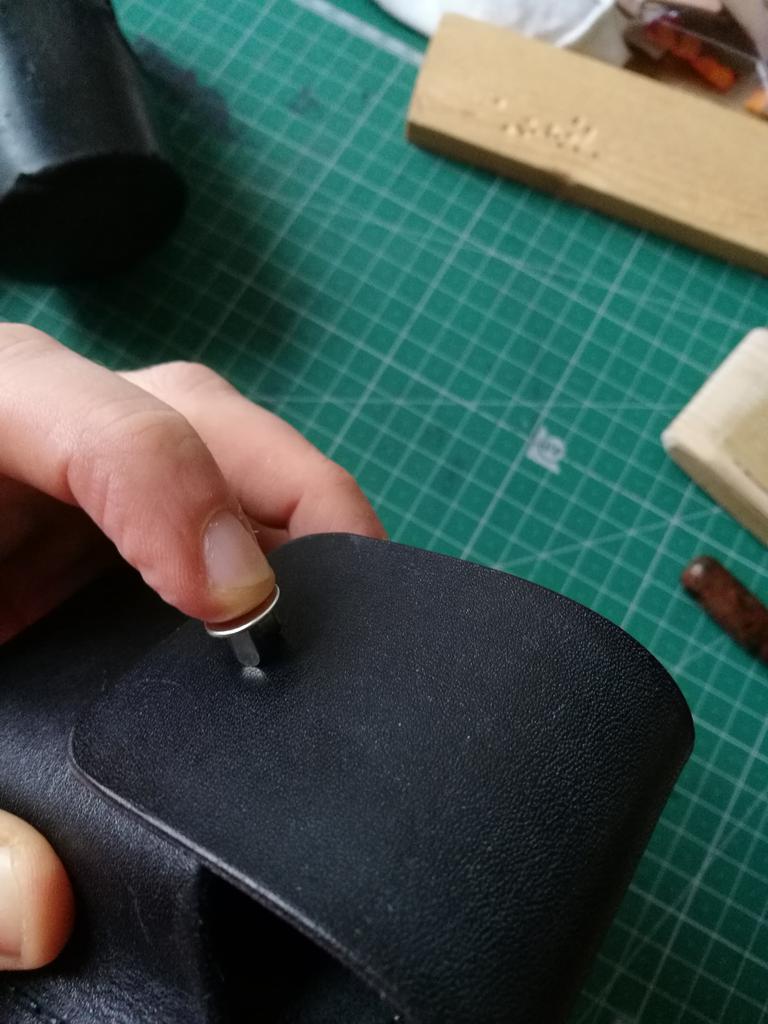
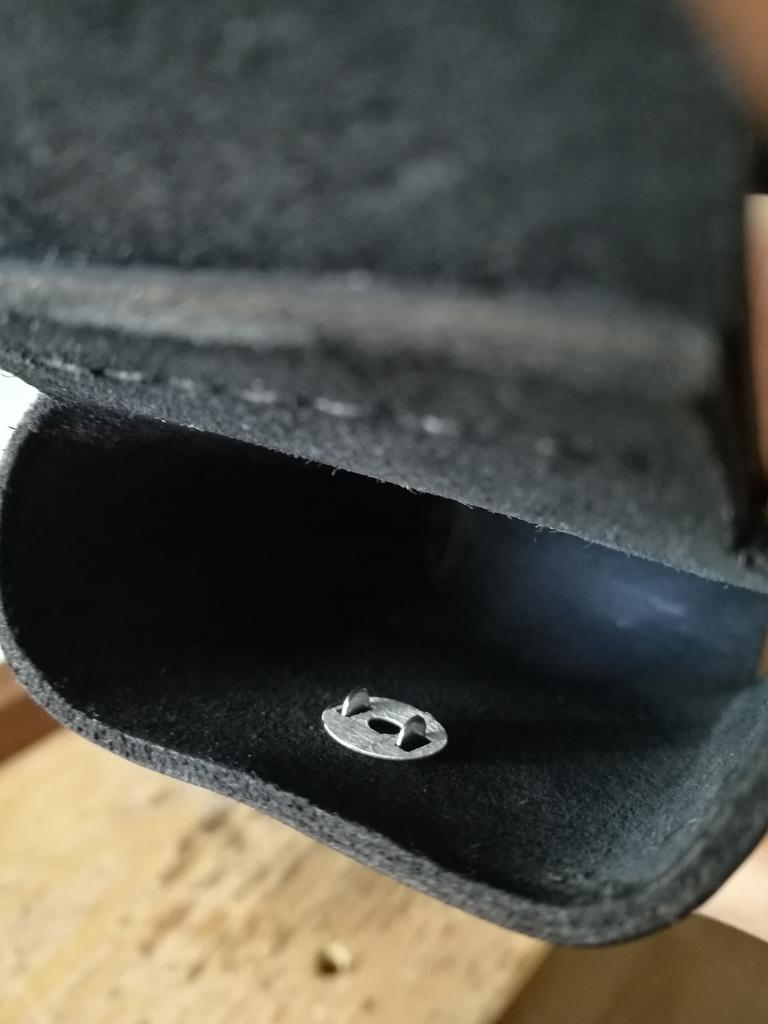
Then push the prongs through, put the metal keeper disc over them and bend the prongs over, first with a rolling motion with a pair of pliers to get them tight then hammering them flat with the mallet and another bit of wood.

To locate the socket side of the snap correctly on the body of the sheath, I positioned the flap where I wanted it then pressed the "ball" on the side I'd just installed into the leather, then punched and installed it; a little trickier on this side as the keeper was inside the sheath, but with another block of wood slid inside it was easy to punch and get the prongs flat.

Then, some padding. My friend had asked that the pouch not be too tight a fit in case it could be reused for another phone, and in any case because I was working from a slightly approximate form I wanted to allow a little flexibility, but without the phone rattling around.
To that end, I'd made the pouch very slightly oversized, with the aim of padding it back to measured size with felt - then even if the dimensions and shape of the phone differed a little it would still be a snug fit, where the stiff leather wouldn't accomodate more than a tiny variation.
Padding it was as simple as cutting a couple of neat rectangles of black felt, adding a thin layer of leather cement and slipping them into place.


I used my straight edge to slide them into the sheath without touching the sides and press them firmly against the inner surface.

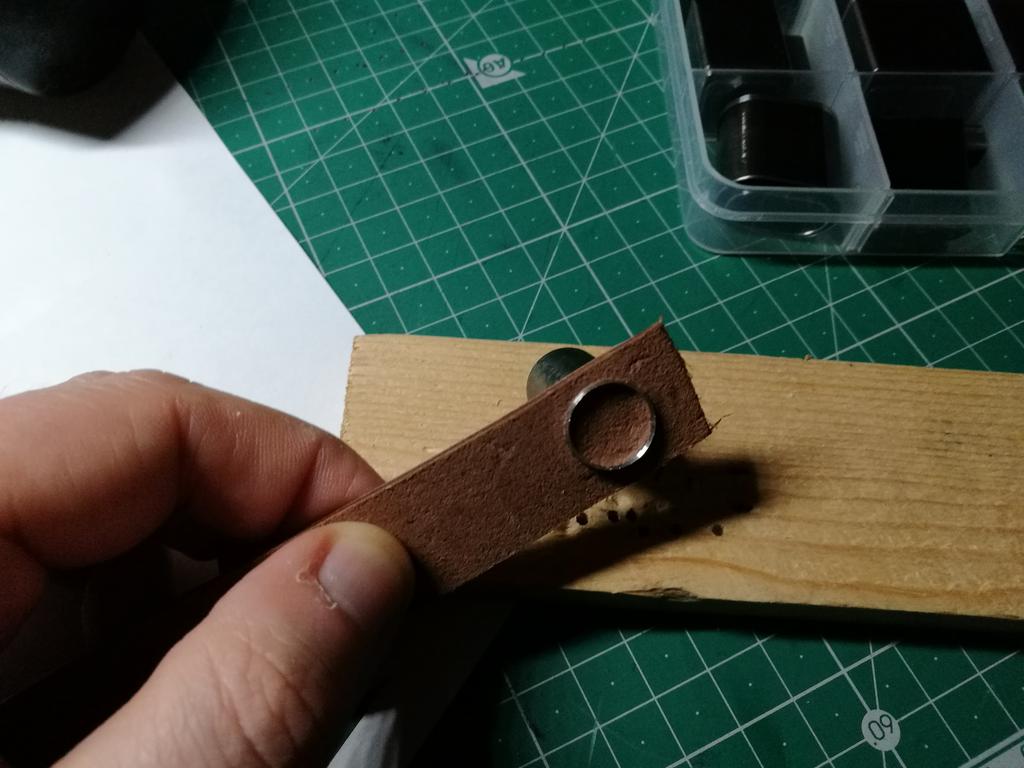
I did make one last-minute addition - I was concerned about the back of the snap possibly working its way through the felt and scratching the phone, so I added a little square of leather glued over the back of the snap under the felt.

There was one final problem to solve, and it was one I'd been wrestling with since I made the portfolio case - how to cover the visible back of the snap fastener, which was both a bit unsightly and could scratch or catch on things.
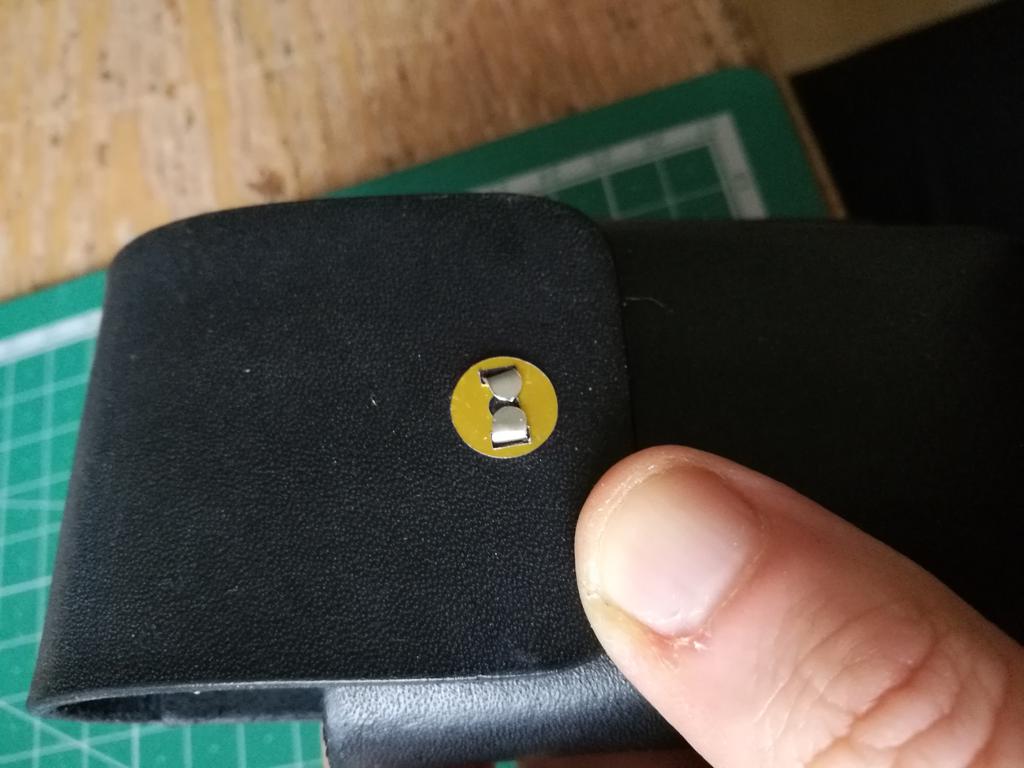
I'd finally decided to cover it with a "button" of leather, but I had to figure out how to punch it out neatly and have it fit snugly over the back of the snap.
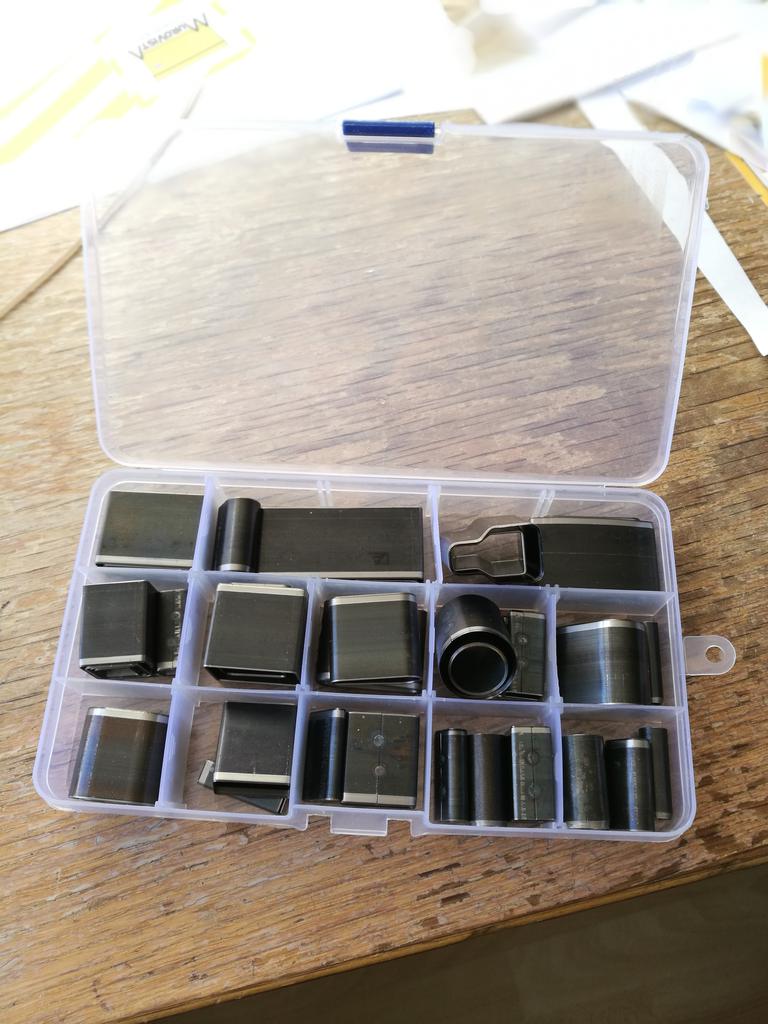
Experiment one was grinding a hollow steel rod I had in my "bits box" to a sharp edge, to use as a punch.
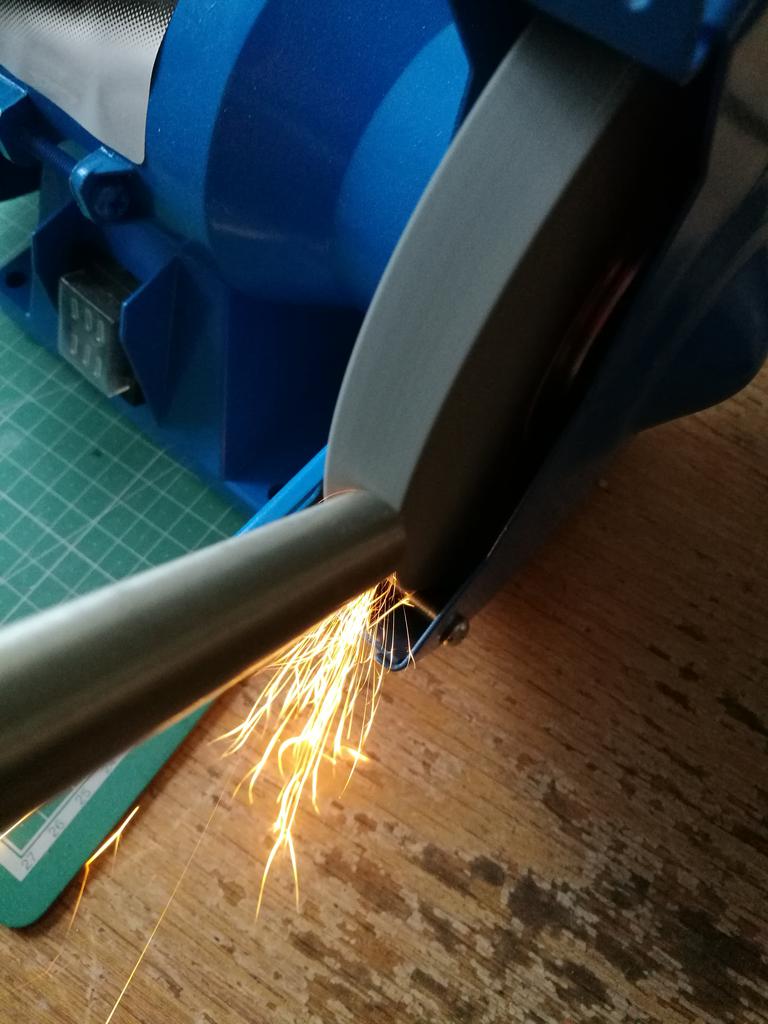

It made a good dent but once the edge was sharp enough to cut the leather it was too brittle and just folded over, and I didn't have another steel rod of a suitable diameter.


A further experiment with the nearest thing in the house I had to a punch also failed due to structural issues. Fortunately I never eat apples anyway.

Having exhausted improvised solutions I felt justified in ordering a proper punch kit and doing it the easy way.

By soaking the disc in warm water for a few minutes I was able to shape it into a slight cup with my fingers, to give a nice rounded face and also a snug fit over the snap back. With a good gob of expoxy it formed a rock solid bond over the snap that resisted all my efforts to pry it loose, so I was satisfied it would survive any knocks and bumps when in use.
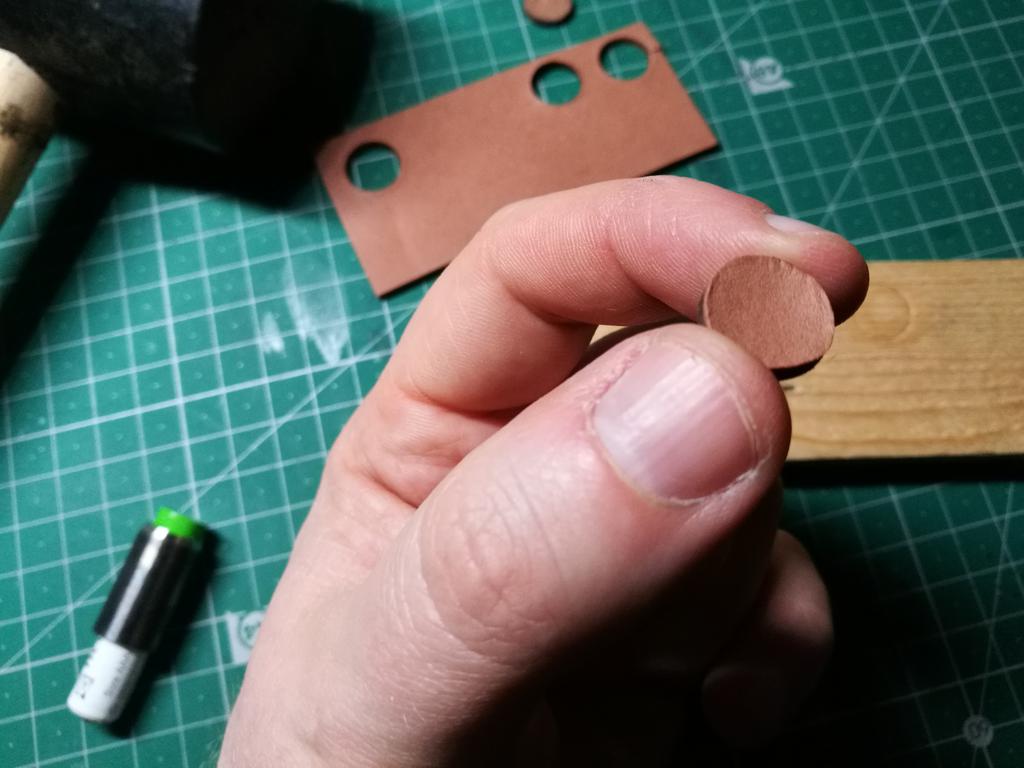

All that was left was to dye and wax the button, and the pouch was finished.


As I said at the top, I went into this project with some nerves but it turned out to be really satisfying and nice to have the driver to push through and figure out the challenges involved.
Next week is my week off, so next post will be up on the 31st of March.
See you soon!